Wednesday, 6 June 2012

Chanel Inspired Cake


I finally got to create the cake that has been floating around in my head for months!  This cake was inspired by these Chanel runway designs.  There are some things I love about my cake and definitely a few things I would do differently or not at all.  I love the ruffle effect on the bottom tier, it took forever but it turned out exactly as I had pictured it.  I should have made the pink a lighter shade but I forgot that fondant can actually deepen in colour as you let it sit.  I had a very difficult time with the stencil on the top tier.  Instead of using royal icing with the stencil I just brushed on petal dust to add the colour.  This was very difficult to line up so I wasn't super pleased with the result, I will need to practice this skill for sure.  The pearls turned out great, they were inspired by the pearls around the first models waist.

The cake itself is a dark chocolate cake filled with raspberry ganache and vanilla swiss meringue buttercream, a delicious combination!

All in all I am happy with the final result and I am glad that I can learn from each creation.

* Update-I found out today that this cake sold for $800 at the charity auction!

Tuesday, 1 May 2012

Fashion As Inspiration


I have been asked to donate a cake for a charity auction and I was struggling to come up with a design.  Today I decided that a great inspiration for colour and design for cakes can come from fabulous clothing.  As far as I'm concerned Chanel is at the top of the list as far as beautiful, classic designs go so I did a simple google search of 2012 Chanel designs and came across this blog. 

Immediately I fell in love with the colours of this second dress and the texture of the skirt.  I will try to incorporate the colours and textures of the clothes but hopefully I will be able to add an element from the shoes as well.  Wish me luck!  The cake is due May 31 so I will post pictures soon after.  Happy Tuesday!

Friday, 20 April 2012

Dessert Tables

I was lucky enough to work with some of the best in the business to create these two stunning dessert tables.  It was a first for me to work on a project like this and I would do it again in a heartbeat!  Here is their contact information, if you are getting married anywhere in the Okanagan I strongly suggest hiring these fabulous and creative vendors.


Photographer: Royce Sihlis Photography 
www.roycesihlis.ca

Vintage Prop Rentals & Paper Crafts: Vintage Origami
www.vintageorigami.com

Florist Design & Arrangement: Classic Creations
www.classiccreationsfd.com

Cookie Design and Creation: Sarah's Sweets
www.sarahssweets.ca

Signage & Graphic Design: Modern Invitations
www.moderninvitations.ca

Mock Shoot Stylist: Vintage Origami
www.vintageorigami.com


Saturday, 14 April 2012

Lululemon Cake

This was for my dear friends 40th birthday, my first strawberry short cake!


Tuesday, 10 April 2012

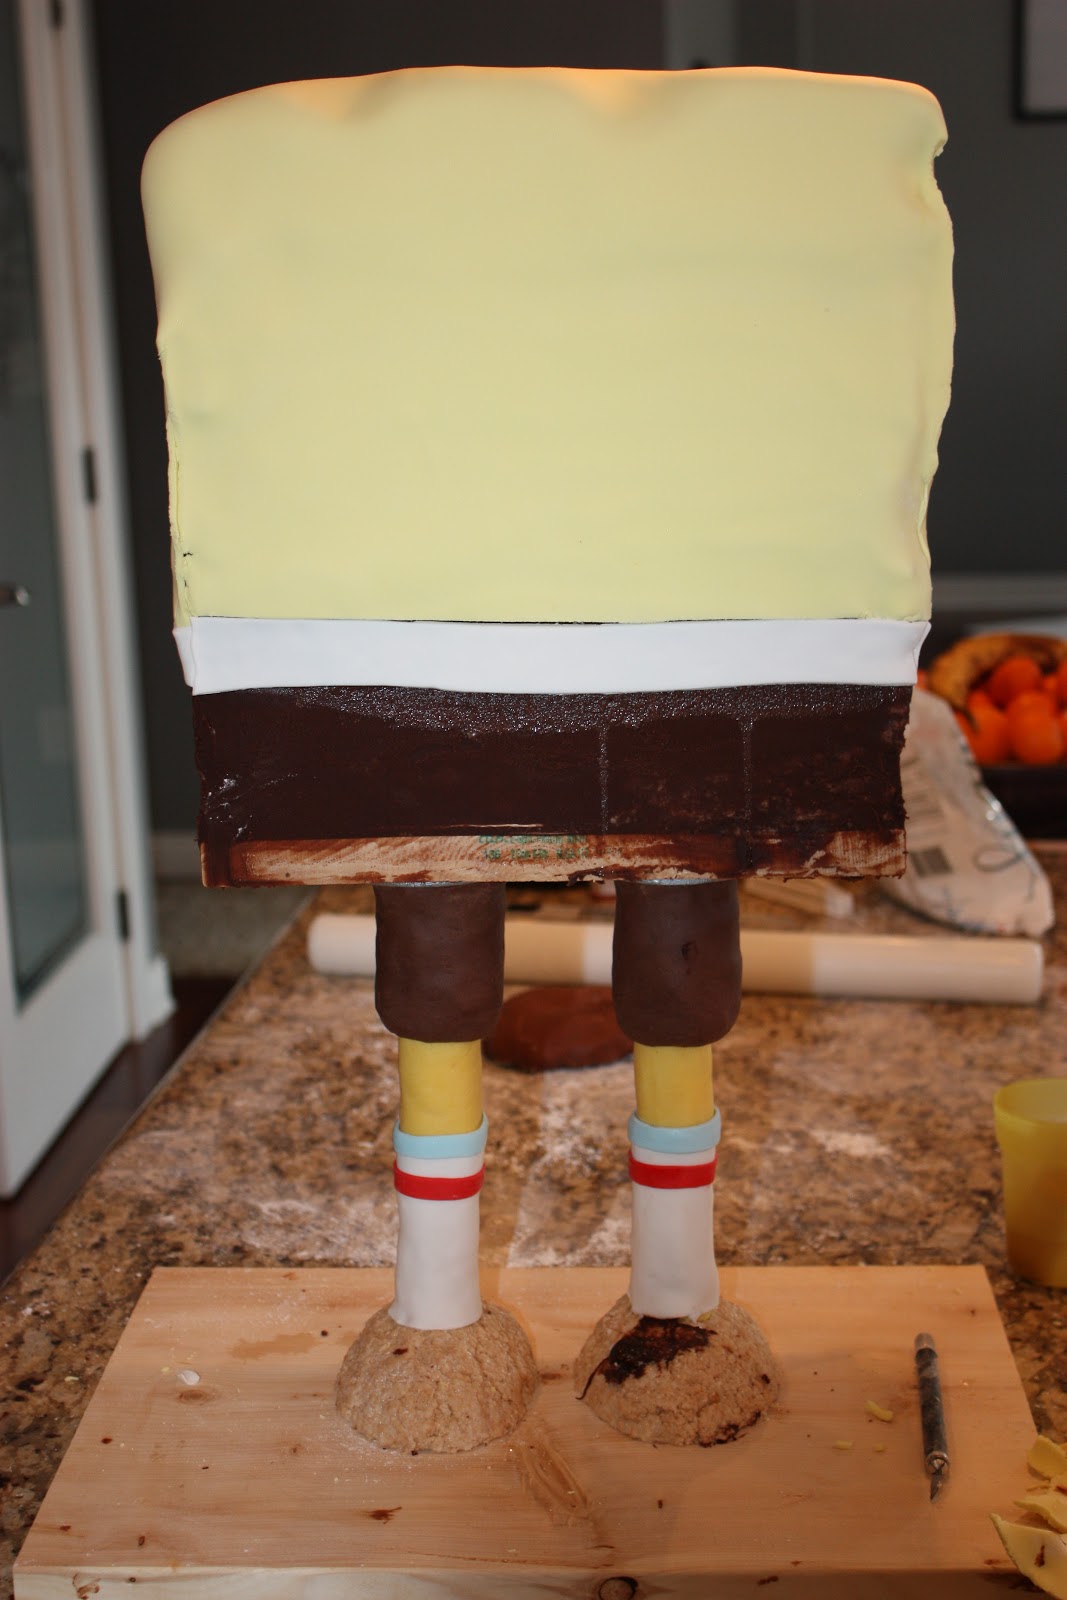
Sponge Bob Cake


This year my son wanted Sponge Bob for his birthday so that is what he got! Here are some pictures that take you through start to finish.  This is the first time that I had to build a structure like this for a cake and I learned a lot.  His entire body is cake and his arms are modelling chocolate.  I hope you like it!

Friday, 17 February 2012

Beer Mug Cake


This was such a fun cake to do!  I have been dying to do one of these for what seems like forever!
I friend from work approached me about doing a 19th birthday cake for her daughter.  Since 19 is the legal drinking age in this province she thought it would be appropriate to make the cake liquor related.  Her first thought was a wine bottle but this cake jumped into my mind so I asked her if she would mind if I tried it.  She was all in!

This was my first time working with sugar and I learned a lot.  I found this recipes on Allrecipes.com and thought it would work for what I needed, if you would like to try it click here.  The most surprising thing about making the sugar was how quickly it cooled on the cookie sheet so I wasn't really prepared to work so fast.  A tip I have for you is to make sure you grease the cookie sheet with cooking spray or Crisco and also cover your hands in Crisco before forming it.  It will be very hot so be careful, have a sink full of cold water on standby.

Just after I removed the sugar from the heat I added some yellow and some brown food colouring to make it as close as possible to beer colour.  When it was slightly cooled I formed it around a long dowel. I wish I had made it slimmer but it was cooling so quickly I didn't have time to thin it out.  Lesson learned!  I also had to make the handle at the same time, again I  wish I had had more working time with it as I would have like to make it smoother and less lumpy.  To attach it to the cake I put a wooden skewer in both the top of the handle and the bottom before it hardened too much.  I left the skewers long so that they would keep there place in the cake better.

The cake itself is made of 4-6 inch chocolate rounds filled with chocolate ganache and iced in all vanilla buttercream.  I hope you like it, I think the next time I make it it will be even better as I have learned so much.  Have a great weekend!

Wednesday, 8 February 2012

Just Peachy


OK these are the last photos I am going to share before I post the results of my photo shoot from last weekend!  I was lucky enough to work with some fabulous Okanagan talent to create two beautiful sweets tables.  When Royce our photographer shares the wonderful pictures with me I will share them with you along with a list of the brilliant people I got to work with.

This is one of the cakes I made for the shoot, two toned peach buttercream roses!  A simple concept that always comes out beautiful.

Tuesday, 31 January 2012

Ruffle Cake


I have been collaborating with some local businesses and this weekend we are putting together two dessert tables for a photo shoot.  This is one of the cakes that I will be using.  This is my first attempt at a ruffle cake and I am pleased with the finished product.  I found a tutorial on You Tube by searching for "ruffle cake tutorial" and it was so easy to execute!  I used a 124 petal tip but you could probably use any size petal tip that you may already have.

I will post more pictures soon of the display cakes, cupcakes and cake pops that I will be making so stay tuned!

Wednesday, 18 January 2012

Vintage Cupcakes


I have the opportunity to work with two fabulous ladies for a vintage inspired photo shoot in a couple of weeks.  Yuriko from Vintage Origami and Sarah from Sarah's Sweets, they are both located in Kelowna, BC.  I wanted to try out some ideas and this is what I came up with!

Friday, 13 January 2012